Trust But Verify: A Step-by-Step Stress Protocol for Testing Plugins Before They Touch Your Real Sessions
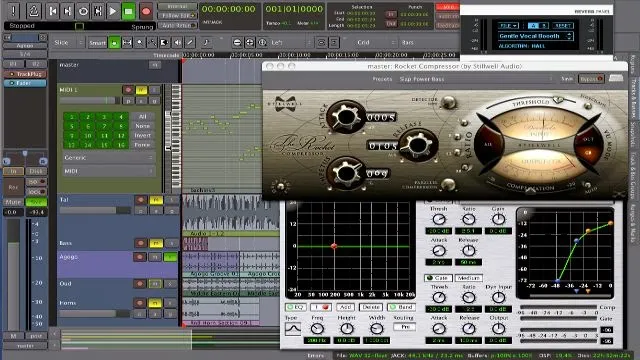
Photo: audio producer testing software plugins on Linux laptop in recording studio environment, via 4.bp.blogspot.com
Every Linux producer has a version of the same horror story. You found a plugin, checked the compatibility list, saw the green checkmark, built a track around it — and then it fell apart somewhere between the mix and the bounce. Maybe it crashed on export. Maybe it silently corrupted automation data. Maybe it worked perfectly for three sessions and then started introducing clicks that took you a week to trace back to the plugin.
Compatibility lists aren't lying to you, exactly. They're just answering a very narrow question: did this plugin load and produce audio on someone's Linux system at some point? That's not the same as "will this plugin hold up in your actual production workflow." Not even close.
What follows is a repeatable testing methodology — we're calling it the Bounce Test — that we've refined through a lot of painful experience. Run any new plugin through this before it goes anywhere near a project you care about.
The Core Principle: Isolation First
The entire framework depends on one non-negotiable rule: test in a dedicated session, not in a real project. Create a blank session in your DAW specifically for plugin evaluation. Name it something like plugin-test-bench and keep it around permanently. This session has no creative stakes, which means you can push plugins hard without risking anything.
The test bench session should have a basic signal chain already set up: an instrument track with a MIDI loop running, an audio track with a short audio clip looping, and a master bus. That's it. You're testing the plugin, not your arrangement.
Phase 1: The Load and Basics Check (15 Minutes)
Before you do anything interesting, confirm the fundamentals.
Does it load without errors? Open your DAW's plugin manager, scan the plugin, and watch the log output if your DAW exposes it. Silent failures — where a plugin appears to load but isn't actually processing audio — are more common than you'd think, especially with bridged Windows VSTs.
Does it produce audio? Insert it on your instrument track and run the MIDI loop. Confirm audio is coming out. Check for any immediate artifacts: clicks, DC offset, unexpected silence.
Does it load on a second insert? Open a second instance on a different track. Some plugins handle multiple instances fine; others have licensing checks or memory issues that only appear on the second load. You need to know this now.
Does it survive a session save and reload? Save the session, close your DAW completely, reopen it, and load the session. Check that the plugin state — parameters, presets, routing — is exactly what you left. This catches serialization bugs that are surprisingly common on Linux, particularly with bridged plugins where the state-saving handshake between the bridge layer and the plugin can go sideways.
Phase 2: CPU and Stability Under Load (30 Minutes)
This is where a lot of plugins reveal their real character.
Run it for 30 minutes continuously. Set your MIDI loop playing, insert the plugin, and walk away. When you come back, check for: any CPU usage creep (a plugin that starts at 3% and is at 9% thirty minutes later has a memory or processing leak), any audio artifacts that weren't present at the start, and whether your DAW is still responsive.
Test at your real buffer size. Don't test at a comfortable 512-sample buffer if you mix at 128. Test at the buffer size you actually use. Some plugins behave fine at high buffer sizes and fall apart when the buffer drops.
Add a CPU load. Insert several other plugins alongside your test subject — doesn't matter what they are, just pile on enough to get your CPU meter into the 60-70% range. Now observe the test plugin. Does its behavior change? Does it start introducing glitches that weren't there under light load? Real sessions are busy. A plugin that only works in isolation isn't a production tool.
Test during plugin GUI interaction. Open the plugin's interface and start moving parameters while audio is playing. A surprising number of plugins introduce audio glitches specifically when the GUI is active and being manipulated — a threading issue that only shows up under interaction.
Phase 3: MIDI and Automation Behavior (20 Minutes)
This phase catches the quirks that destroy workflows rather than sessions.
Set up MIDI learn and save. Assign a MIDI CC to a key parameter using the plugin's MIDI learn function. Save the session. Reload it. Is the MIDI assignment still there? This fails more often than you'd expect, and discovering it mid-performance is not fun.
Draw automation on a key parameter. Create a simple automation lane for a parameter — a filter cutoff, a wet/dry mix, anything that moves. Play it back and listen carefully. Does the automation track cleanly? Are there zipper artifacts or stepping that suggests the plugin isn't handling automation messages smoothly? Check whether the automation curve in your DAW matches what you're actually hearing.
Test automation at session boundaries. Draw automation that starts on bar 1 and runs to bar 8. Loop bars 4-8 and listen through several loop cycles. Some plugins don't reset their automation state correctly on loop points, which creates increasingly wrong parameter values over time.
Phase 4: The Crash Recovery Scenario (15 Minutes)
This one's uncomfortable but necessary.
Force a worst-case scenario. With your test session running, deliberately do something that might destabilize things: unplug and replug your audio interface, rapidly open and close the plugin GUI, switch sample rates in your DAW settings. Note whether the plugin crashes, whether it takes the DAW with it, and whether your session recovers cleanly.
Check the session file after a crash. If the plugin does crash your DAW, reopen the session file and verify it's intact. Some DAW and plugin combinations can corrupt session files on crash. Better to find out now.
Building Your Evaluation Log
After running a plugin through all four phases, write down your results. Doesn't need to be elaborate — a single text file with the plugin name, version, your system specs, the date, and a pass/fail for each phase takes five minutes and saves hours later.
Over time, this log becomes genuinely valuable. You'll start to see patterns: which bridge configurations are most reliable, which plugin formats cause the most trouble on your specific hardware, which developers' products consistently pass versus consistently fail.
The compatibility lists tell you what worked on someone else's system once. The Bounce Test tells you what works on yours, reliably, under real conditions. That's the only answer that matters when you're an hour from a deadline and your session needs to hold together.